Wiring a bee hive frame with basic tools
The basic wiring of a bee hive frame and application of foundation is often overlooked and at times completely avoided when establishing a new bee hive. Although there is a large amount of discissuon and at times disagreement around the reasons for wiring frames and using foundation, we are keen to assist those who have chosen to use wax foundation but have concerns about the complexity of wiring a frame.
The basic tools required to tension the wire in the frame are:
1. Hammer - to afix the anchor nails for each end of the wire (hopefully you used one of these to assemble the frame)
2. Pliers - to pull and tension the wire, and cut the wire if required
3. Sidecutters - to cut the wire if your pliers are old and blunt
4. Unspent rivet - to make installing the brass eyelets a much simpler process
5. Wooden board - to hold frame steady (not absolutely required)
6. Embedding power source - for heating wire to embed foundation
Pliers and sidecutters, in case they are called something completely different where you are reading this from

1. Spool of wire - available from beekeeping supply stores
2. Brass eyelets - often overlooked but critical component
3. Nails - used to anchor the wire at both ends
4. Wax foundation - available from beekeeping supply stores, we highly recommend 100% beeswax
A spool of wire from a beekeeping store
Brass eyelets bought in quantity or weight. Eight eyelets are required for each Langstroth frame

To make installation of the eyelets a simple process, thread them onto the unspent rivet and then use this to push the eyelets into the end bars of the frame. Repeat the process and ensure all eight eyelets are installed.
Brass eyelets threaded onto unspent rivet
Using the rivet to push the eyelets into the end bars

The installed brass eyelets will look something like this (at both ends)

The pine board with wooden frame pieces cut to hold frame in place

Ensure the timber in the wiring board is slightly narrower than the end bars of the frame and doesn't obstruct the wire path

There should be a small amount of friction when pushing the frame into the wiring board
End bar nail placement at the top of frame with nail protruding

End bar nail placement at the bottom of frame with nail protruding

The complete process is described below (with more images coming soon):
1. From the top right of frame, feed in the wire in through the brass eyelet and out the left end bar top eyelet
2. Through the next hole down, feed the wire back into the left end bar towards the right and back out the right end bar. Follow this process until the wire exits at the bottom right eyelet
3. Wrap the wire around the bottom nail several (3) times and hammer this nail in the remainder of the way
4. Using the pliers, pull the bottom wire to the left to tighten and then hold the wire at the bottom left eyelet
5. Using the pliers, pull the second wire from the bottom back towards the right end bar to tighten and hold the wire at the right end bar eyelet
6. Repeat this process once more towards the left, and again towards the right, holding the wire at the eyelet after each step
7. While maintaining tension on the wire, wrap it several (3) times around the top nail and hammer this nail in the remainder of the way
8. With the wire installed and the anchor nails hammered in completely, cut the excess wire using the sidecutters and ensure there are no sharp edges remaining
Wire threaded through frame and wrapped around lower anchor nail before hammering nail in
Completed wiring step with both anchor nails hammered in completely and excess wire removed
Sheet of foundation inserted into groove in top bar
Foundation laying flat on tensioned wires with gap at bottom of frame, ready for embedding
To embed the foundation, use the power source to heat the wires one at a time by making contact with each end of the wire. When the wire begins to melt through the foundation, remove the power source and let the melted foundation cool. Once a single wire is fully embedded, repeat for the remainder of the wires in the frame.
Note: We have intentionally not detailed the power source used to heat the wires, please ask a local beekeeper to assist and provide more details before attempting this step.
Terminal contacting top wire at left of frame

Terminal contacting top wire at right of frame

Top wire melting into the wax foundation. Remove the power source at this stage

Close up showing correctly embedded foundation

1. The basic tools
Without giving away the punch line too early, the trick to wiring a frame is all in the tension of the wire. The wire is tensioned in the frame to support the wax foundation vertically in the frame body. With the foundation correctly centred, the bees draw the comb evenly to fill the frame on either side of the foundation sheet and the resulting established comb is evenly supported by the wire.The basic tools required to tension the wire in the frame are:
1. Hammer - to afix the anchor nails for each end of the wire (hopefully you used one of these to assemble the frame)
2. Pliers - to pull and tension the wire, and cut the wire if required
3. Sidecutters - to cut the wire if your pliers are old and blunt
4. Unspent rivet - to make installing the brass eyelets a much simpler process
5. Wooden board - to hold frame steady (not absolutely required)
6. Embedding power source - for heating wire to embed foundation
Pliers and sidecutters, in case they are called something completely different where you are reading this from
2. The extra bits and pieces
The basic items required to add wire to the frame are:1. Spool of wire - available from beekeeping supply stores
2. Brass eyelets - often overlooked but critical component
3. Nails - used to anchor the wire at both ends
4. Wax foundation - available from beekeeping supply stores, we highly recommend 100% beeswax
A spool of wire from a beekeeping store
Brass eyelets bought in quantity or weight. Eight eyelets are required for each Langstroth frame
3. Installing the eyelets
Some beekeepers may suggest avoiding the installation to of eyelets to save 13c, but they serve a very practical purpose. Eyelets prevent the wire cutting into the wooden frame. When the wire cuts into the frame it loses tension and may cause the foundation to sag. Although the wire may appear to hold tension correctly when initially wiring the frame without eyelets, the pressures of radial/tangential extraction on the frame or even simply handling the frames over several seasons can cause the wire to 'cut in'.To make installation of the eyelets a simple process, thread them onto the unspent rivet and then use this to push the eyelets into the end bars of the frame. Repeat the process and ensure all eight eyelets are installed.
Brass eyelets threaded onto unspent rivet
Using the rivet to push the eyelets into the end bars
The installed brass eyelets will look something like this (at both ends)
4. Holding the frame steady
Although not absolutely critical, a board to hold your frame while wiring will assist in assembly. The framing board doesn't need to be glamorous as the 'woodwork' in the below photos shows. The below wiring board was made out of a piece of 19mm pine board with the scraps of a single Langstroth frame nailed into place to hold a frame. The points that hold each end bar of the frame are slightly narrower than the frame width to assist in tensioning the wire when the frame is removed.The pine board with wooden frame pieces cut to hold frame in place
Ensure the timber in the wiring board is slightly narrower than the end bars of the frame and doesn't obstruct the wire path
There should be a small amount of friction when pushing the frame into the wiring board
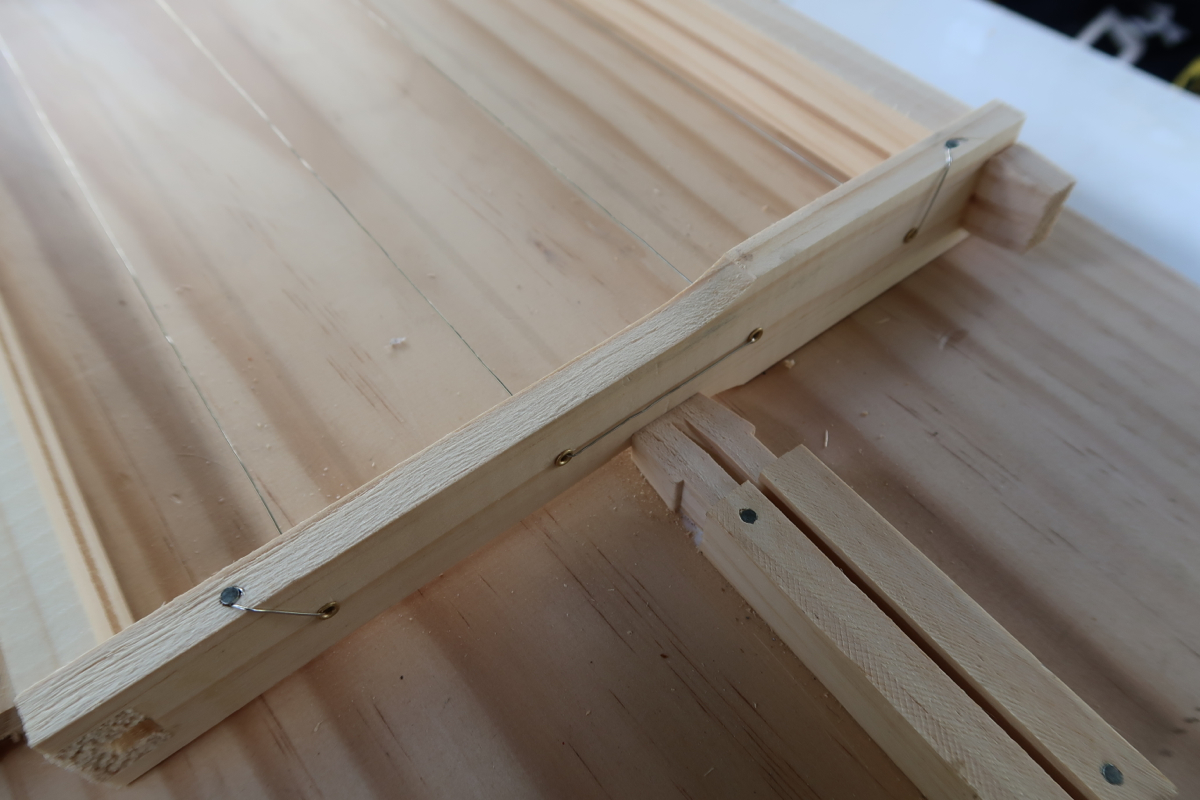
5. Anchoring the wire
If you've managed to assemble the frame it is assumed you can use a hammer. Using the same hammer, hammer two nails into the side of the right end bar (if you are right handed) leaving several millimeters of the nail protruding. These nails may need to be slightly smaller than those used on the frame bars to avoid splitting the end bar. Tacs can be used, but ensure they are long enough to avoid falling out under tension.End bar nail placement at the top of frame with nail protruding
End bar nail placement at the bottom of frame with nail protruding
6. Threading the wire
Once the eyelets and anchoring nails are installed, the wire can be threaded through the frame and tightened using the pliers. Although this is the most complex part of the process, I have taken the least amount of photos.The complete process is described below (with more images coming soon):
1. From the top right of frame, feed in the wire in through the brass eyelet and out the left end bar top eyelet
2. Through the next hole down, feed the wire back into the left end bar towards the right and back out the right end bar. Follow this process until the wire exits at the bottom right eyelet
3. Wrap the wire around the bottom nail several (3) times and hammer this nail in the remainder of the way
4. Using the pliers, pull the bottom wire to the left to tighten and then hold the wire at the bottom left eyelet
5. Using the pliers, pull the second wire from the bottom back towards the right end bar to tighten and hold the wire at the right end bar eyelet
6. Repeat this process once more towards the left, and again towards the right, holding the wire at the eyelet after each step
7. While maintaining tension on the wire, wrap it several (3) times around the top nail and hammer this nail in the remainder of the way
8. With the wire installed and the anchor nails hammered in completely, cut the excess wire using the sidecutters and ensure there are no sharp edges remaining
Wire threaded through frame and wrapped around lower anchor nail before hammering nail in
Completed wiring step with both anchor nails hammered in completely and excess wire removed
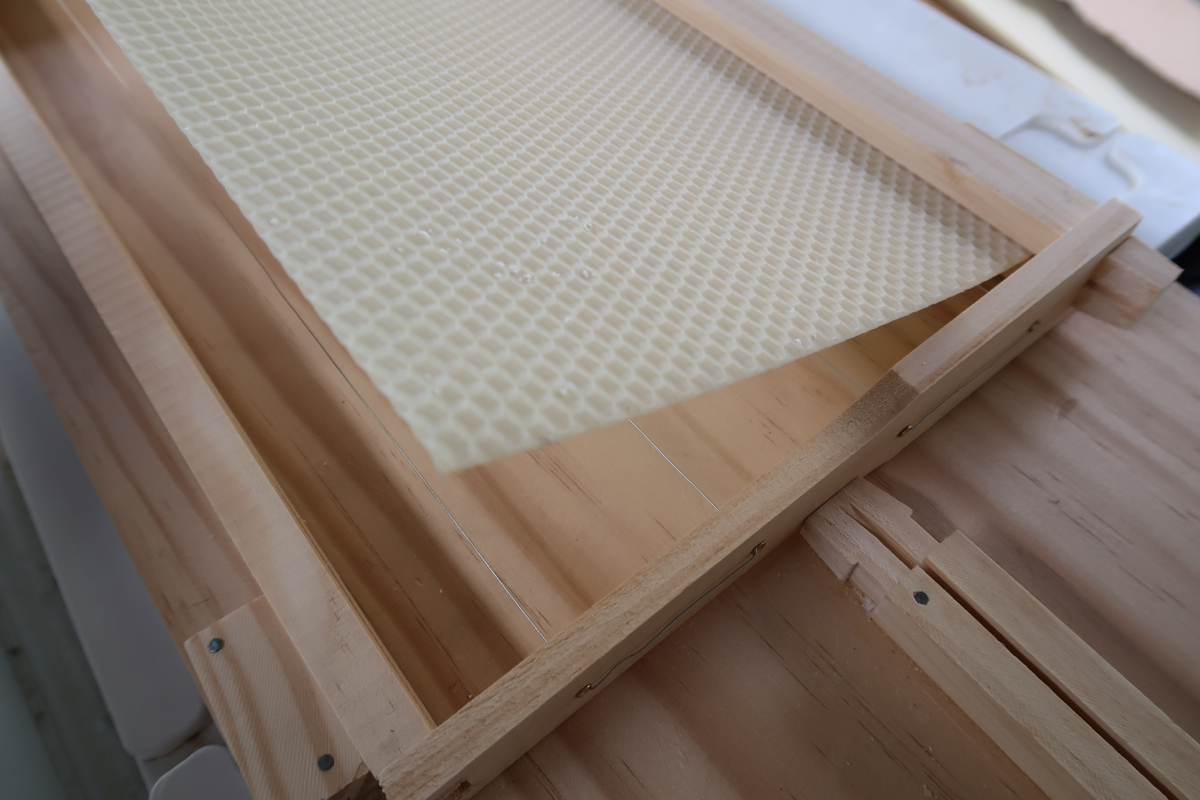
7. Placing the foundation into the frame
With the frame laying flat, insert the sheet of foundation into the groove in the top bar. Ensure that any gap between the foundation and the frame is at the bottom of the frame, with no gap left remaining at the top. In my experience, I have found 'weaving' the foundation through the wires unecessary and weaving the foundation doesn't remove the need for embedding (step below).Sheet of foundation inserted into groove in top bar
Foundation laying flat on tensioned wires with gap at bottom of frame, ready for embedding
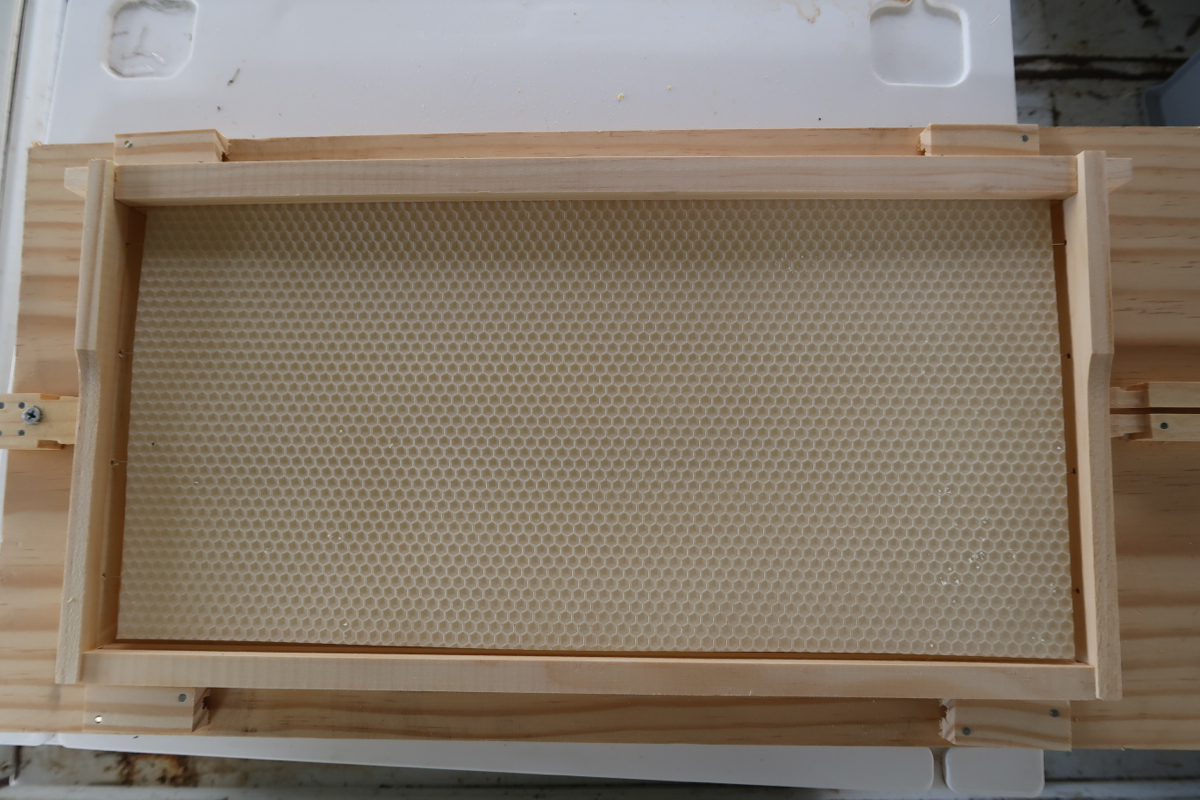
8. Embedding the foundation
Embedding the foundation is another step that is often overlooked due to complexity but is a step that is absolutely critical. Failing to embed the foundation will cause the foundation to slump in the frame when it is exposed to the heat in the hive. The resulting 'wavy' foundation causes major problems when attempting to establish usable comb in the frames.To embed the foundation, use the power source to heat the wires one at a time by making contact with each end of the wire. When the wire begins to melt through the foundation, remove the power source and let the melted foundation cool. Once a single wire is fully embedded, repeat for the remainder of the wires in the frame.
Note: We have intentionally not detailed the power source used to heat the wires, please ask a local beekeeper to assist and provide more details before attempting this step.
Terminal contacting top wire at left of frame
Terminal contacting top wire at right of frame
Top wire melting into the wax foundation. Remove the power source at this stage
Close up showing correctly embedded foundation